Timelines
The Timeline feature allows users to access all communications shared or distributed to a client through the Practice Gateway platform. This includes messages, emails, and documents exchanged throughout the entire client journey, starting from when the client was first added to the system. Users can search the Timeline using specific topics, keywords, or message content. It’s also possible to create a Timeline Note or Record, which will be visible internally on the Contact record. Timeline entries can be filtered by record type, activity type, activity status, activity status reason, posted by, and modified date.
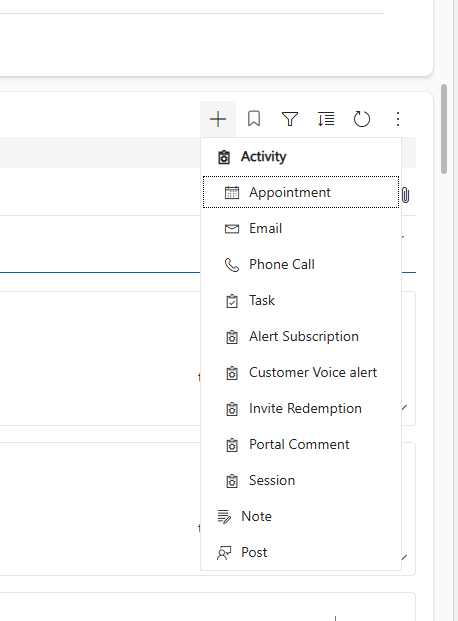
Bookmarks can be added to highlight important entries for quick reference. A Timeline record can be created in various formats, including: appointment, email, phone call, task, alert subscription, customer voice alert, invite redemption, portal comment, note, post, and session.
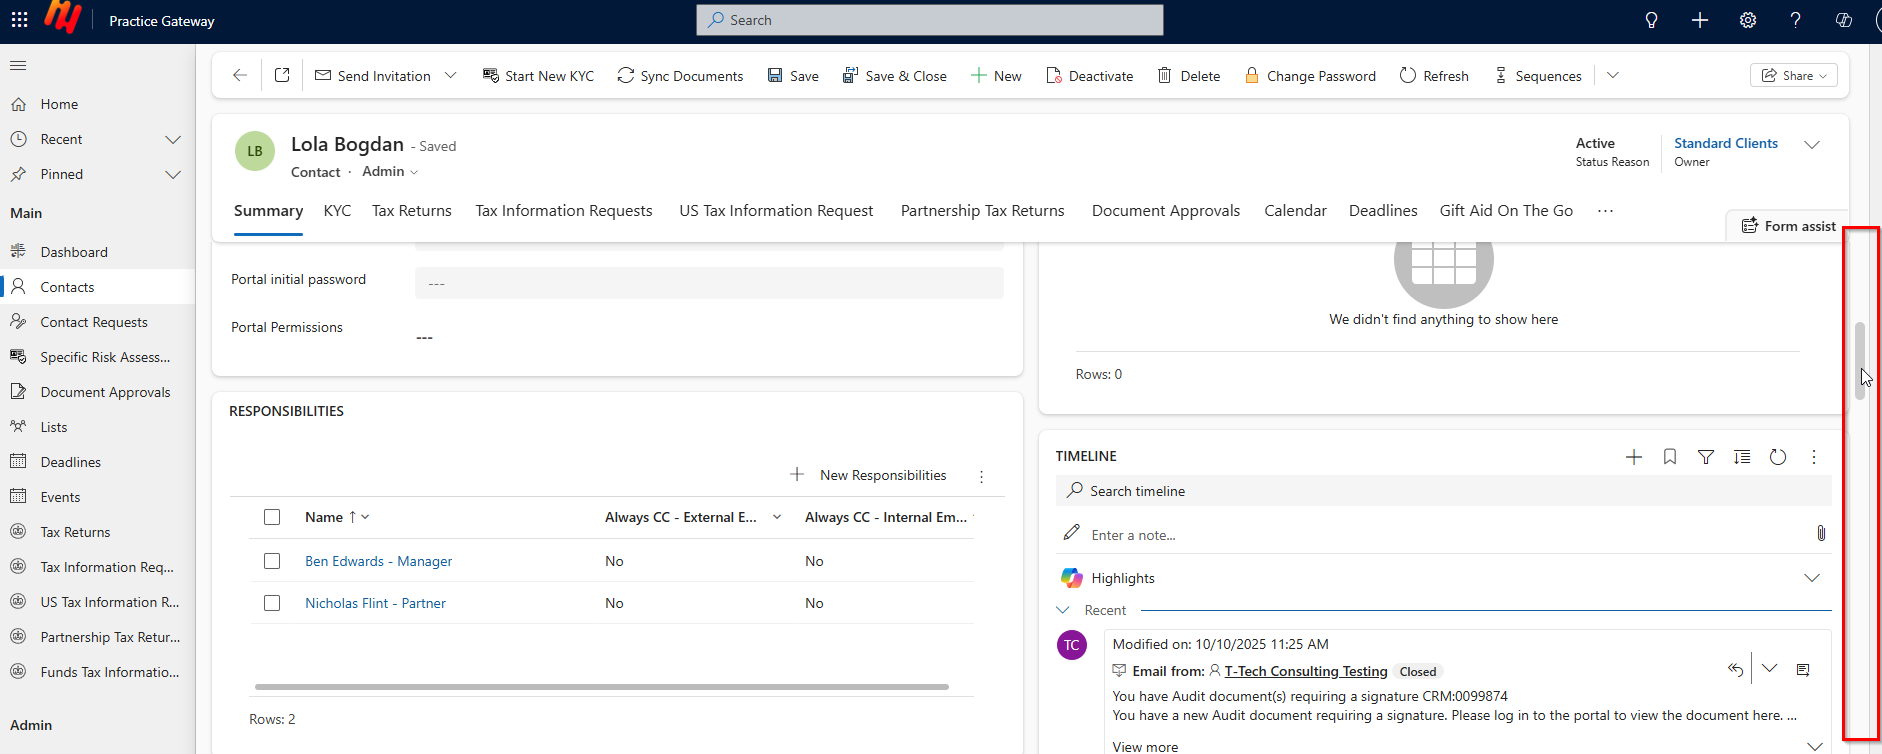
If you cannot see Timeline on your screen, please ensure you have scrolled down and it will be located on your right hand side.
How to access and use Timeline:
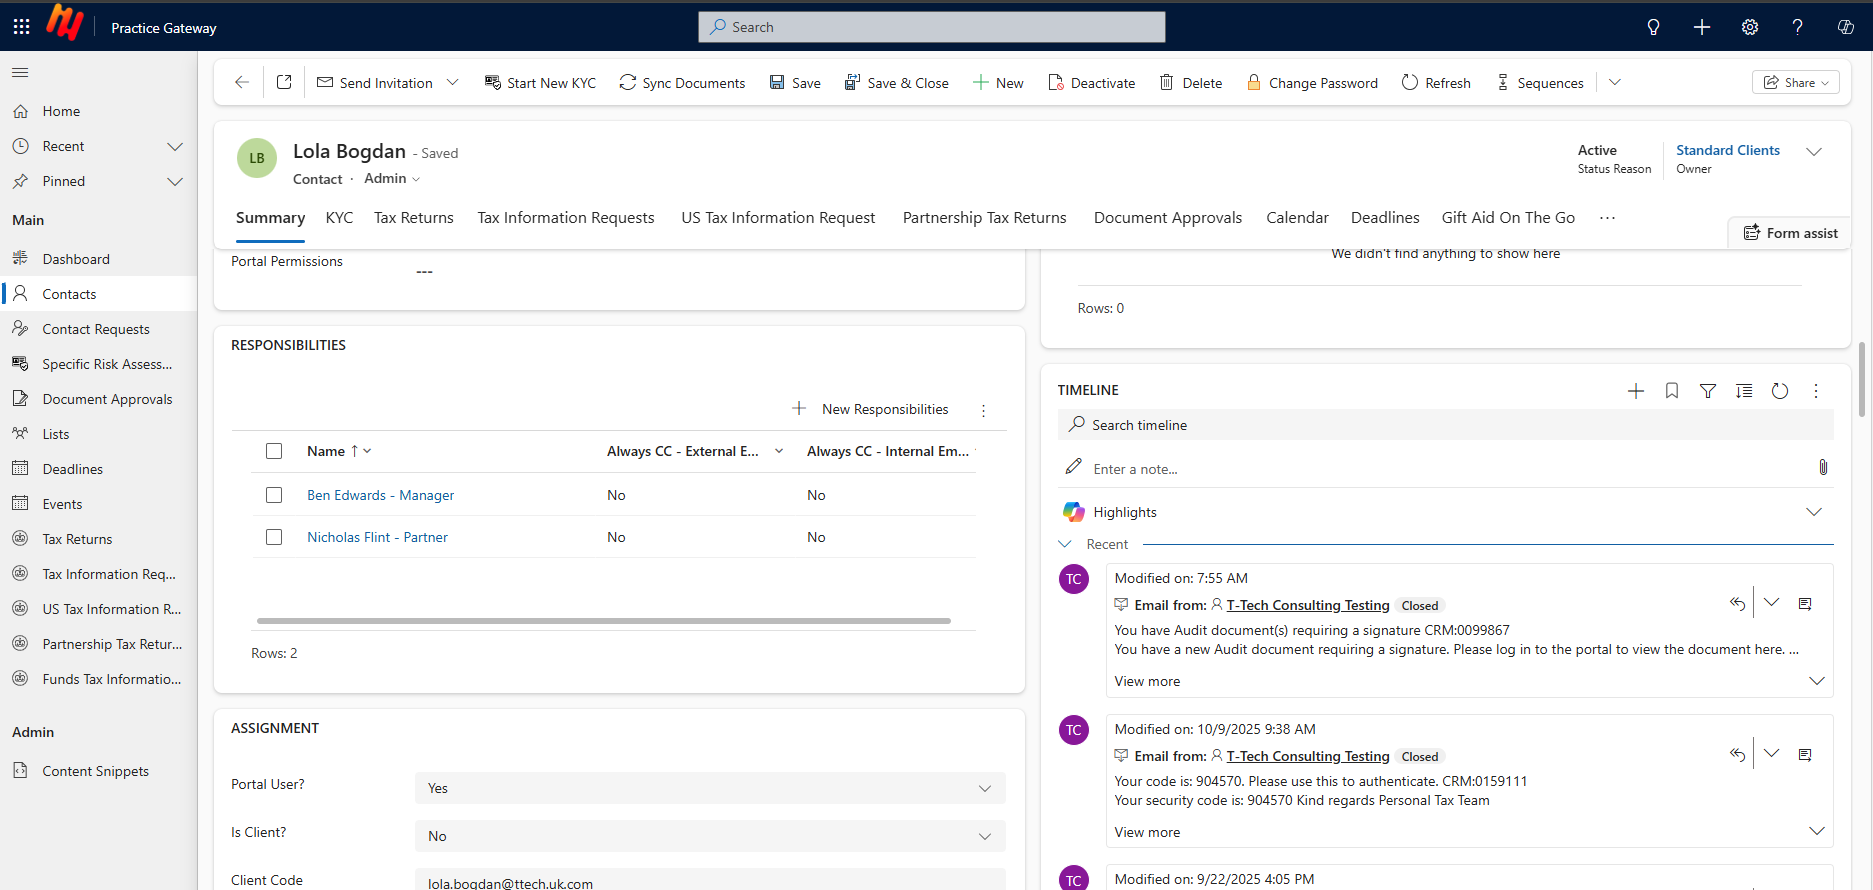
- Select a Contact from your contact list.
- Scroll down util you see Timeline on the right hand side.
- In the Timeline section, select either:
- Create a timeline record
- Create a bookmark
- Apply a filter
- Expand all records
- Refresh
- More commands
- Type your message.
- Press the Save & Close button.
By pressing View more Users can collapse or expand all records to either view full message details or keep the display compact.
Types of Records in Timeline
Timelines can include different types of records, which may be used for internal purposes or for communication with clients. These records help track interactions and activities across the portal.
Records can be created as:
Alert subscription
Appointment
Bookmarks
Customer voice alert
Invite redemption
Note
Phone call
Portal comment
Post
Session
Task
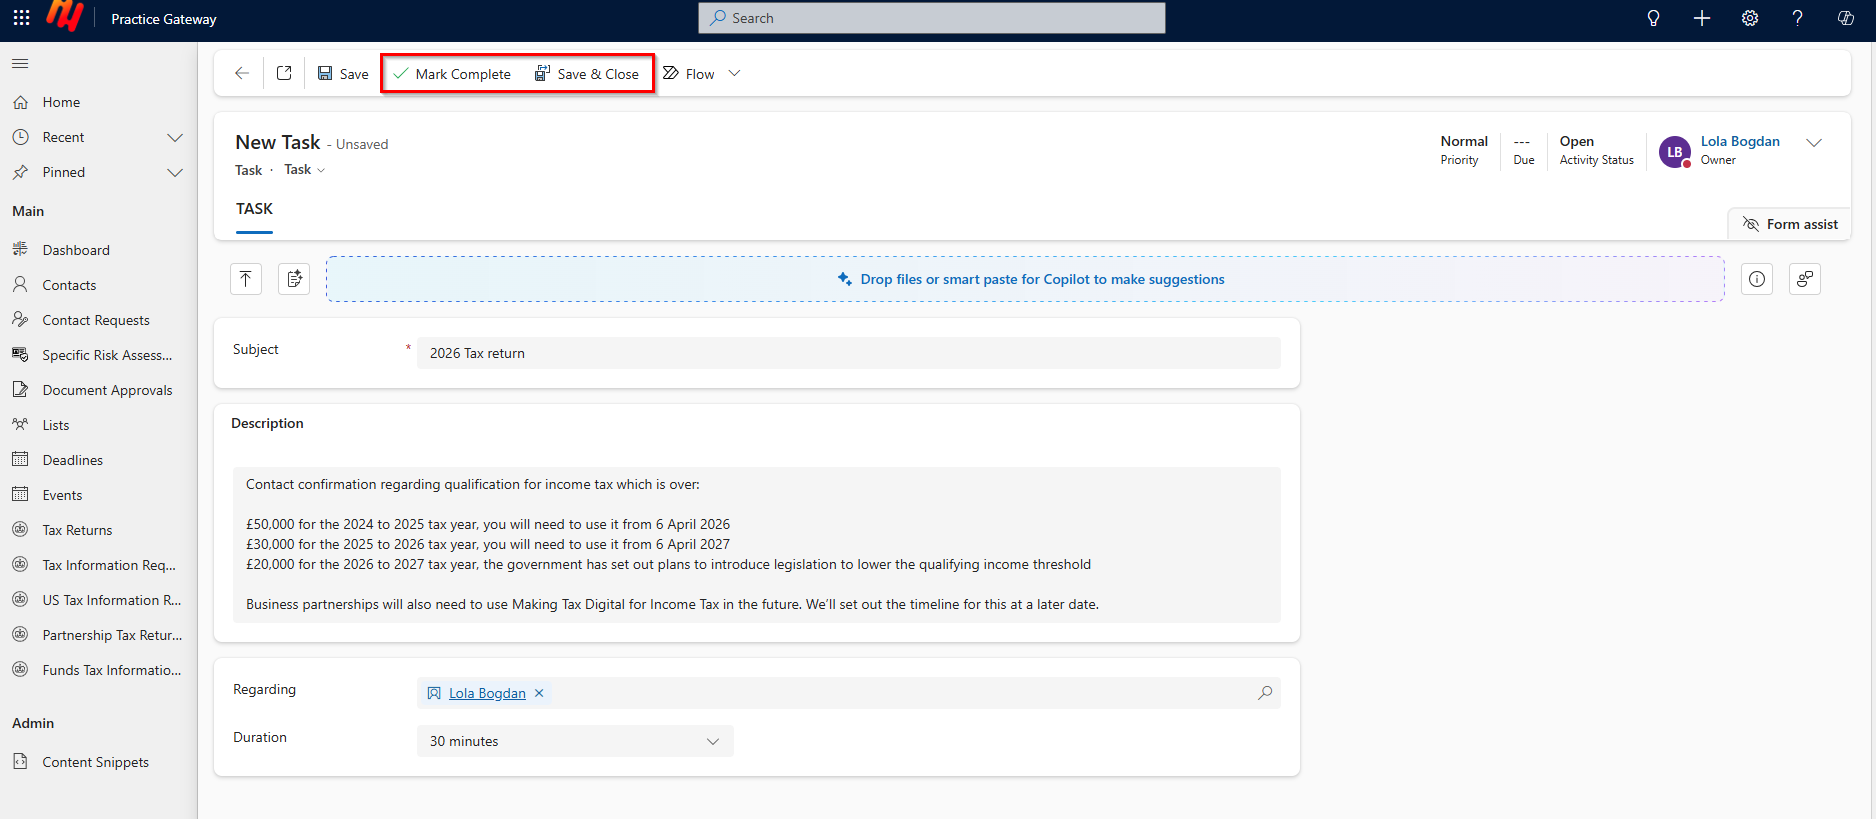
Tasks in Timelines can be used to track work completed by an advisor or partner for a specific contact. A Task can be created either as a Standard task or a Task for an interactive experience.

When creating a Task, the user can enter a subject, description, and select the contact the task relates to. The duration can be set in minutes or days, depending on the nature of the task. Files can be added by either dragging and dropping them into the task or using smart paste. These files can then be used by Copilot to generate suggestions or assist with task completion.

Each record type serves a different purpose and helps ensure that all relevant communication and activity is properly documented.
Timeline record
Step 1: Select a Contact from your contact list
You can search for a Contact using the search toolbar in Practice Gateway or select one from the contact list available to you as a partner or advisor.
Step 2: In the Messages section, click + New Portal Message
A new message can be added via the + New Message tab.
Once sent, the message will instantly notify the user and be stored in the Messages section. It can be accessed at any time and will also be recorded in the Audit History.
Step 3: Type your message
Messages can include standard text up to 500 characters, including spaces and special characters.
Step 4: Press the Save & Close button
After pressing Save & Close, you will be returned to the page where you originally opened the new message.
Timeline bookmarks
Step 1: Select a Contact from your contact list
You can search for a Contact using the search toolbar in Practice Gateway or select one from the contact list available to you as a partner or advisor.
Step 2: In the Messages section, click + New Portal Message
A new message can be added via the + New Message tab.
Once sent, the message will instantly notify the user and be stored in the Messages section. It can be accessed at any time and will also be recorded in the Audit History.
Step 3: Type your message
Messages can include standard text up to 500 characters, including spaces and special characters.
Step 4: Press the Save & Close button
After pressing Save & Close, you will be returned to the page where you originally opened the new message.
Timeline Filters
Timelines can be filtered to help you quickly locate relevant records and activities. The following filter options are available:
Record Type: Choose between Posts and Activities
You can search for a Record Type in Timeline and filter by Posts and Activities.
Activity Type: Filter by specific types such as Email or Invite Redemption
You can search for a Activity Type in Timeline and filter by Email or Invite Redemption.
Activity Status: Select Closed to view completed activities
You can search for a Activity Status in Timeline and filter by Closed to view completed activities.
Activity Status Reason: Further refine by selecting Completed or Sent
You can search for a Activity Status Reason in Timeline and filter by Completed or Sent to view completed activities.
Post By: Use Auto-post to view user or system-generated entries
You can search for a Post by in Timeline and filter by User or Auto-post to view related activities.
Modified Date: Limit results to those modified within the last 30 days
You can search for a Modified Date in Timeline and check any activities within the last 30 days.
Timeline other commands
Step 1: Select a Contact from your contact list
You can search for a Contact using the search toolbar in Practice Gateway or select one from the contact list available to you as a partner or advisor.
Step 2: In the Messages section, click + New Portal Message
A new message can be added via the + New Message tab.
Once sent, the message will instantly notify the user and be stored in the Messages section. It can be accessed at any time and will also be recorded in the Audit History.
Step 3: Type your message
Messages can include standard text up to 500 characters, including spaces and special characters.
Step 4: Press the Save & Close button
After pressing Save & Close, you will be returned to the page where you originally opened the new message.
Visual Guides
How to access and use Timeline:
Step 1: Select a Contact from your contact list
You can search for a Contact using the search toolbar in Practice Gateway or select one from the contact list available to you as a partner or advisor.
Step 2: Scroll down util you see Timeline on the right hand side
Step 3: In the Timeline section, select relevant action
A new record can be added via the + New timeline record button.
Once created, if it is dedicated to the Contact, the message will instantly notify the user and be stored in the Timeline section. It can be accessed at any time and will also be recorded in the Audit History.
Step 4: Press the Save & Close button
After pressing Save & Close, you will be returned to the page where you originally opened new record.